The VLC Media Player is a free and open-source platform developed by the VideoLAN Project that supports a wide range of media formats. Also, the player is supported on various operating systems, making it a popular choice among users for playing videos and audio files.
However, sometimes users might face sound issues with VLC on Windows 11 when playing a particular video or audio file. If you are experiencing such issues, don’t worry as you have come to the right place. In this guide, we’ll discuss some effective solutions to troubleshoot this problem. So, without further delay, let’s begin.
Ways to Fix VLC No Sound On Windows 11
If you’re unable to play sound on video, worry not. Below, we have listed the effective solutions to tackle the sound not working on Windows 11 PC.
1. Turn on Audio/Unmute Audio on VLC
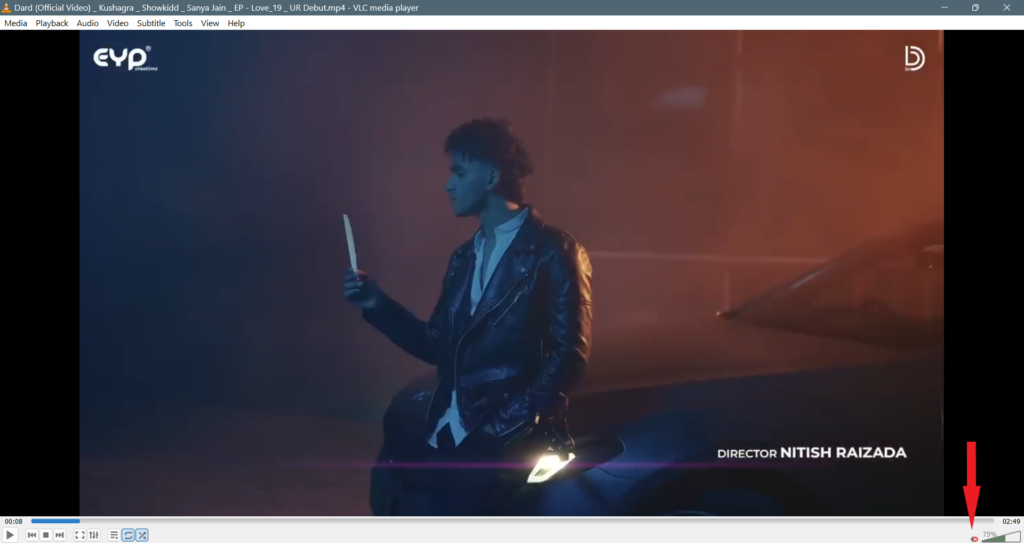
First, start with checking the sound or audio mute option on the VLC media player. Configuration changes you’ve previously made in settings may stop you from playing sound. Make sure to unmute the audio on VLC and then check the results.
To unmute Audio on the VLC media player, follow the steps below:
1. Launch your VLC media player on your computer.
2. If there is a red mark on the volume icon, then it depicts that the sound is muted.
3. Click on the volume icon to unmute the VLC sound.
2. Enable Sound Device
Another thing you have to do is check your sound device settings to ensure it’s not set as disabled. If the sound device is disabled, then you can’t access the audio on VLC on your Windows 11. Make sure to check and enable the sound device.
To do so, follow the steps below:
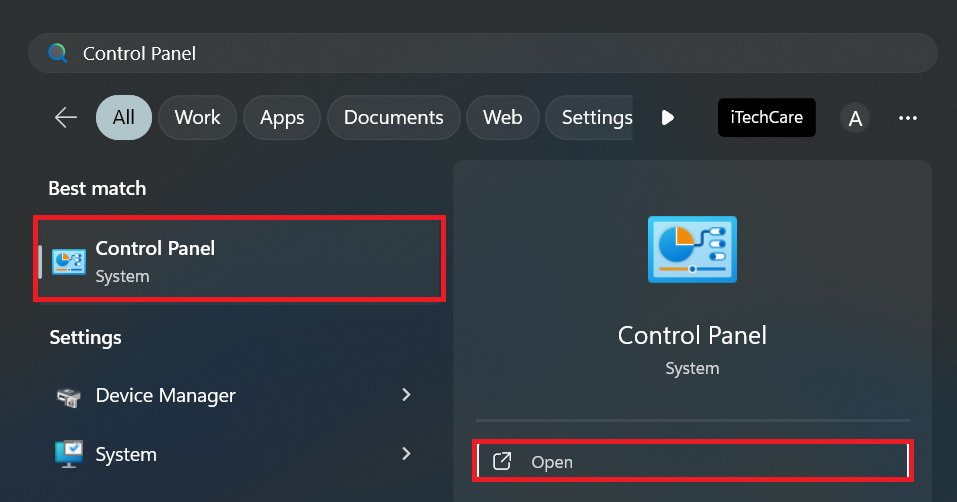
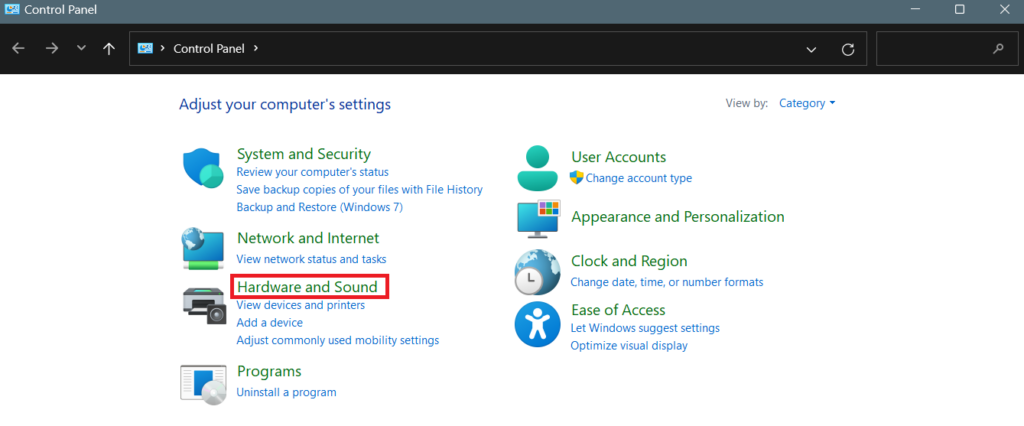
1. Open the Start Menu by pressing the Windows key on the keyboard.
2. In the search bar, type Control Panel and click Open.
3. Under the Control Panel menu, click on the Hardware and Sound option.
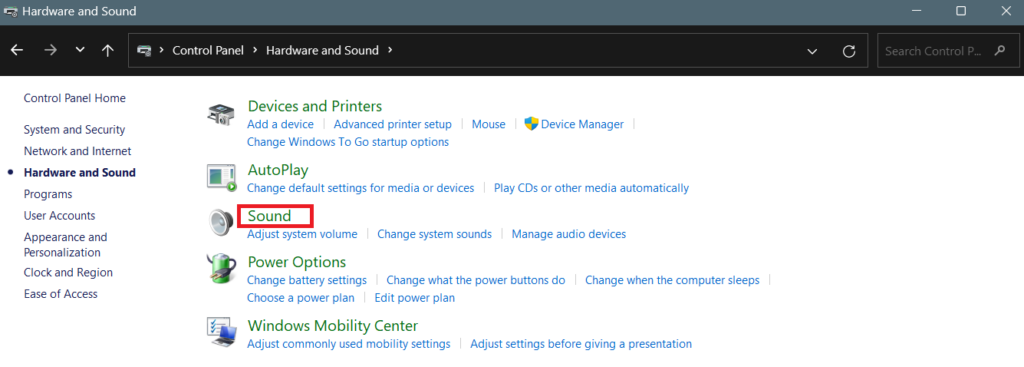
4. Then, click on the Sound option.
5. Under the Playback section, right-click on all audio devices and select Enable from the menu that appears.
6. Once you are done with this, click Apply and OK button to save the changes.
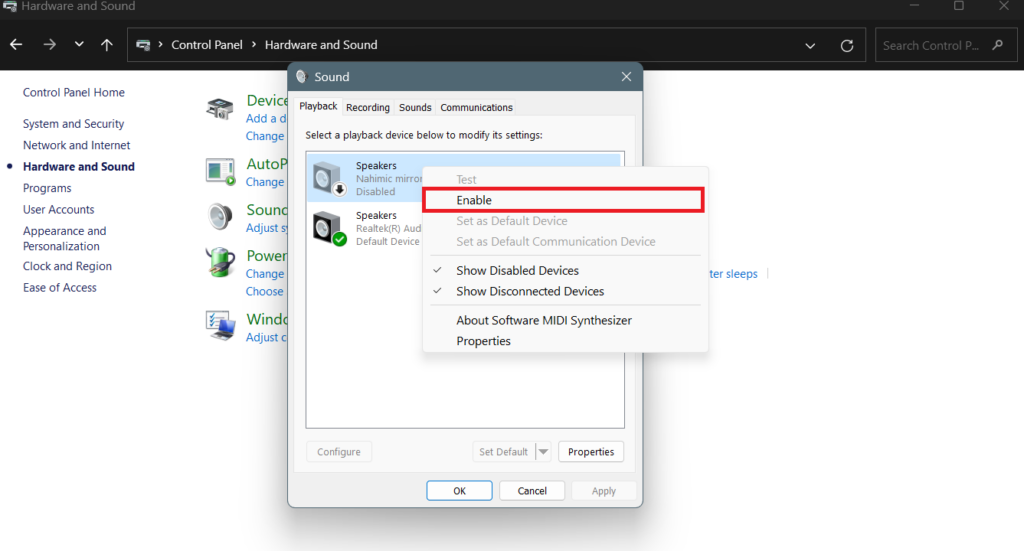
In addition, make sure that your computer volume is not muted. Increase the volume level to 100% and then check if the issue has been resolved. If the issue persists, try the next solution mentioned below.
3. Disable and Enable Audio Track
There’s a possibility that you have disabled the audio track accidentally on VLC which caused the issue with sound.
In that case, the video you are trying to watch will not play with sound or audio. For that, you have to enable the audio track.
Here are the steps you can follow to check the audio track settings to fix the issue:
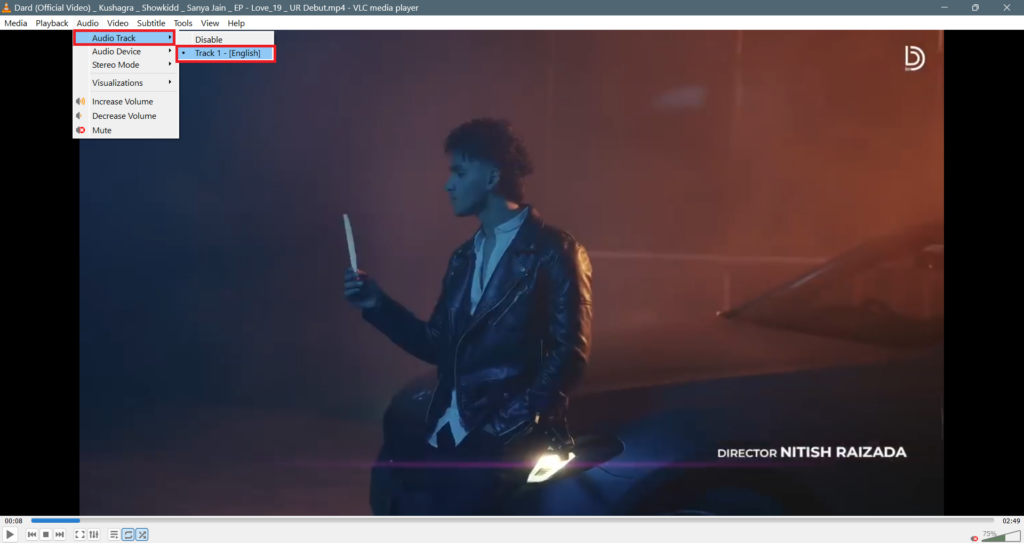
1. Launch VLC Media Player on your computer and try to play a video by choosing the video file.
2. Click on Audio from the top menu bar and choose the Audio Track option. Ensure the video is playing.
3. Disable the Audio Track by clicking the Disable option, and enable it by choosing the Track option. For instance, on this media file, we have to select Track 1 – English. Similarly, you will get the option accordingly.
4. After that, the no-sound issue on the VLC Media Player should be resolved.
4. Change the VLC Output Module
Generally, the output modules on VLC are used to control devices by shifting data and signals. But if you’re unable to play videos with sound or the audio is not working then you can change the VLC output module to fix the problem. This will help you get back to playing sound in videos.
To change the output module on the VLC media player, follow the steps below:
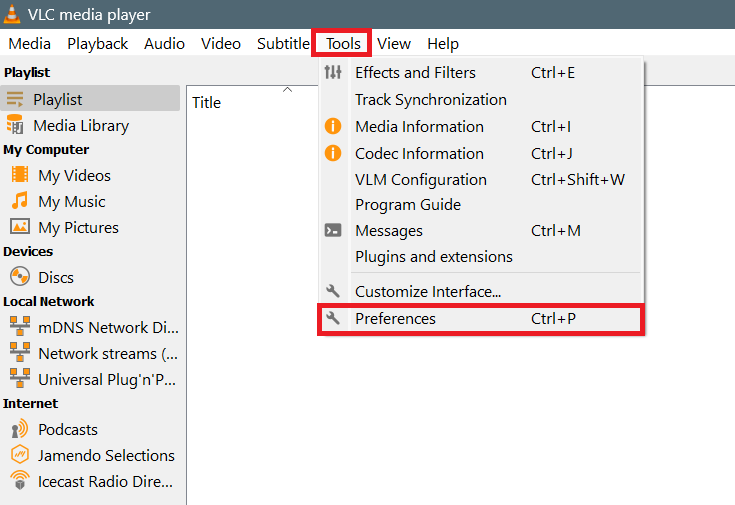
1. Open the VLC interface and click Tools from the top menu bar.
2. Then choose Preferences from the pop-up menu.
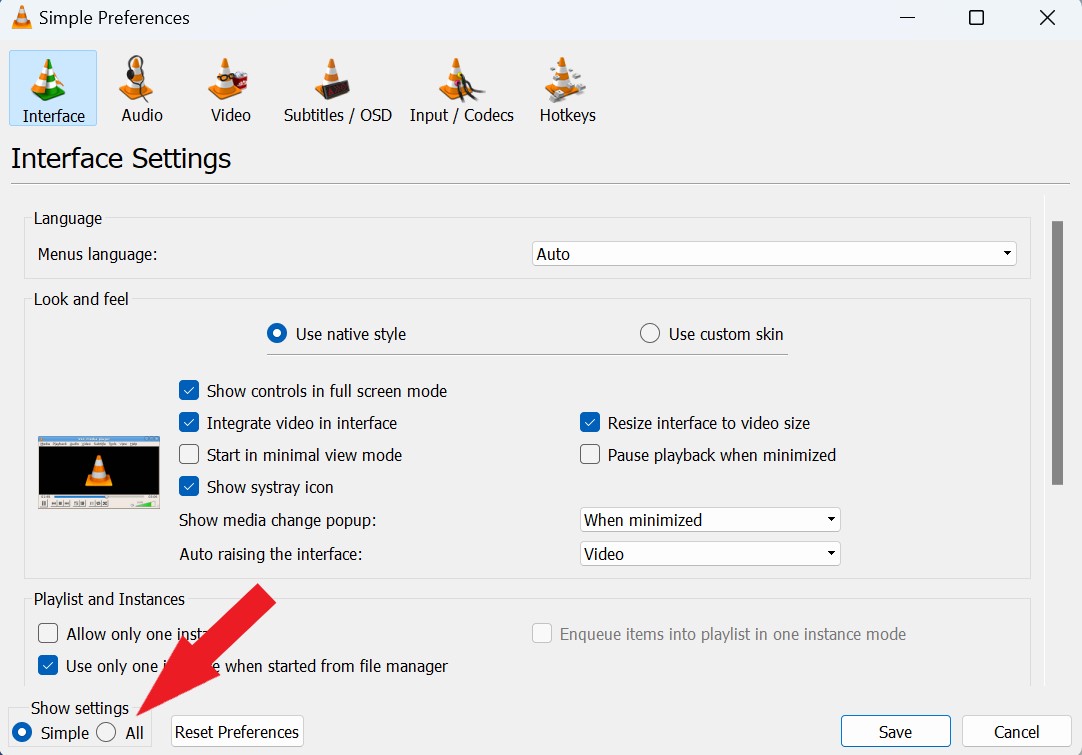
3. Under the Simple Preferences menu, click on All below Show settings to get the advanced options.
4. Under the Audio section, click the Output Modules option.
5. Then, select Windows Multimedia Device Output from the Audio Output module drop-down menu.
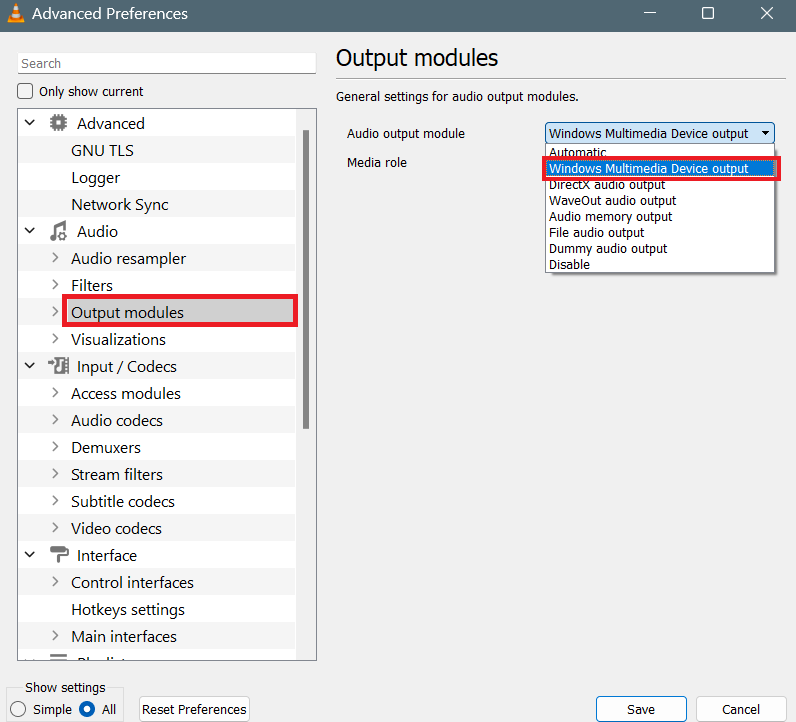
6. Then, click on the Save button to confirm the changes.
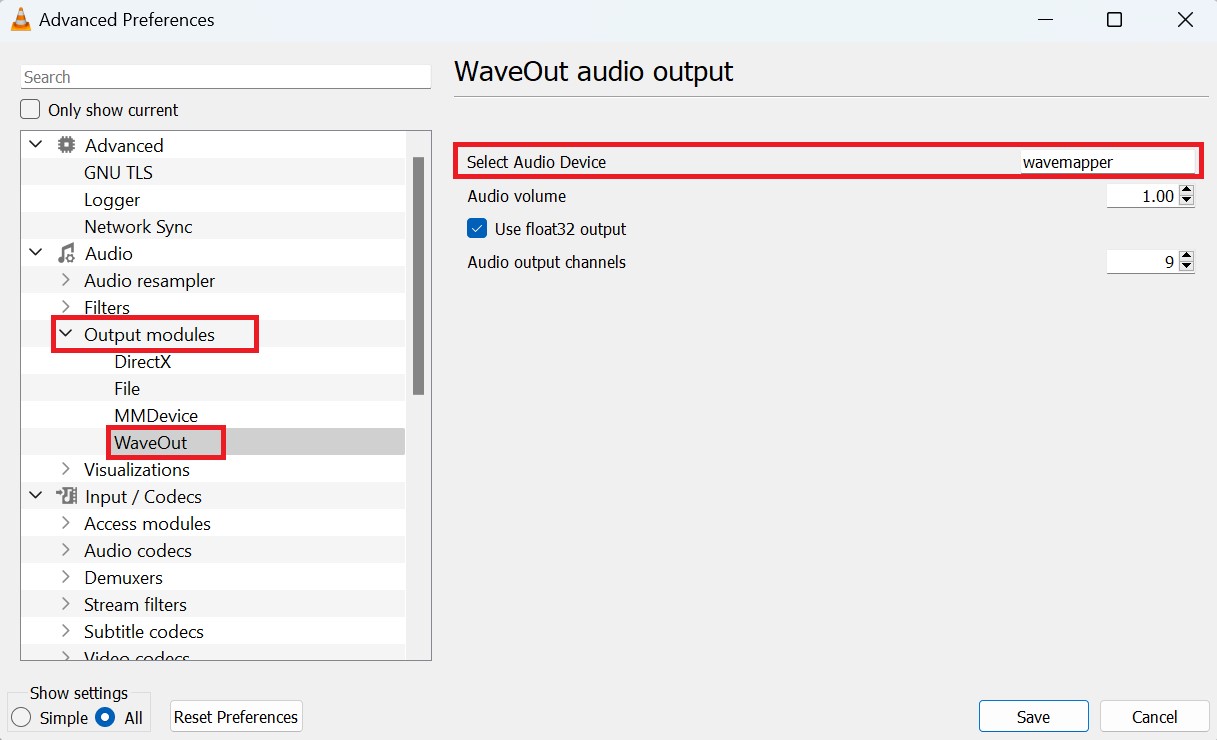
7. After that, again open the Advanced Preferences settings and expand the Output Modules option.
8. Then select the WaveOut option.
9. After that, choose the speaker or headphones using the Select Audio Device by clicking on the drop-down menu.
10. Click the Save button to confirm the changes and check the results.
5. Adjust VLC Audio Settings in Preferences
If changing the VLC output module doesn’t work to solve the sound not working issue, then you can adjust VLC audio settings in preferences.
To adjust audio settings in preferences on VLC, follow the steps below:
1. Open the VLC media player on your computer.
2. Click the Tools option from the top menu bar and then choose Preferences.
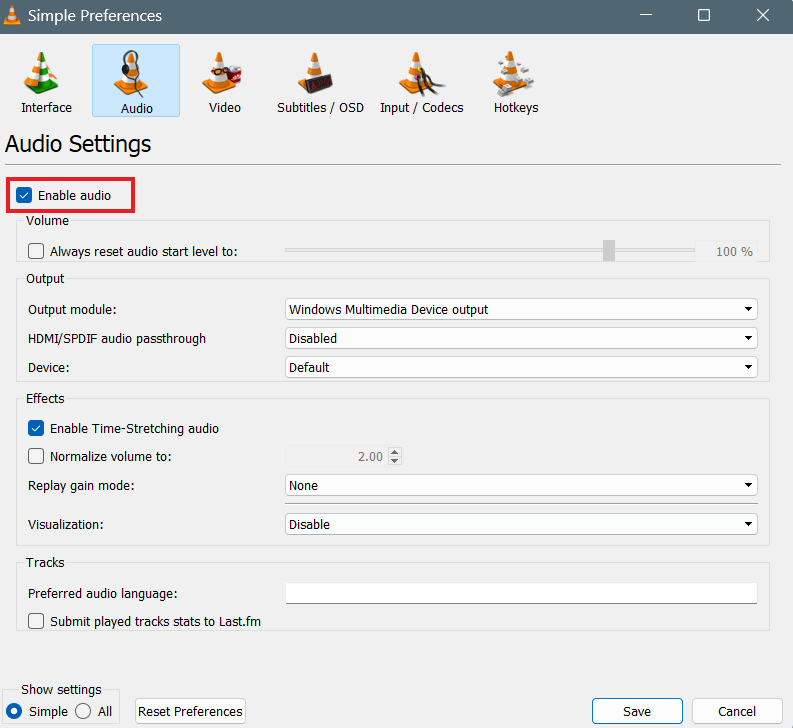
3. Under the Simple Preferences window, click the Audio tab and ensure the Enable audio box is checked.
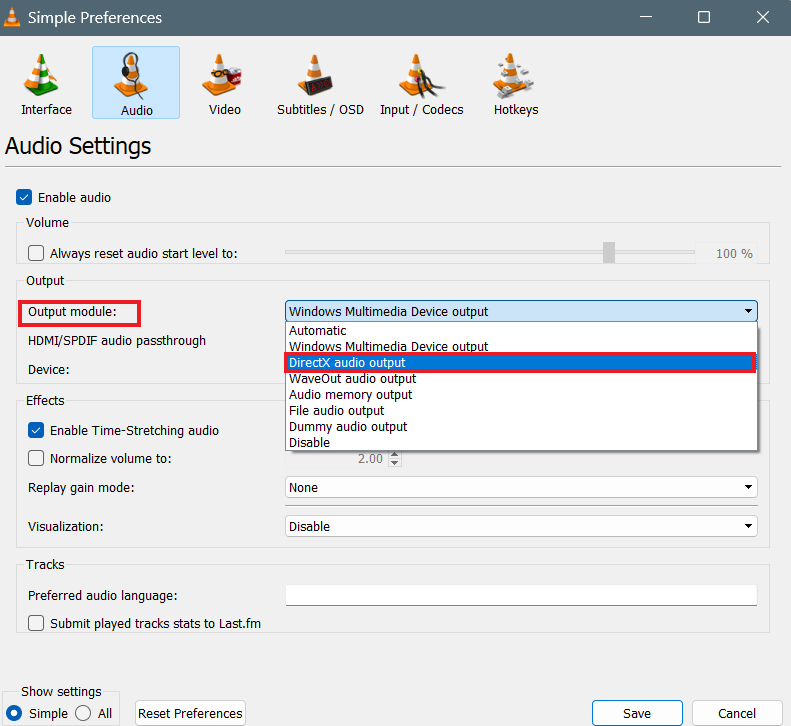
4. In the Output module settings section, click on the drop-down menu and select the DirectX audio output option.
5. Then, click the Save button to save the changes.
6. After that, restart your VLC media player and check if the issue is fixed.
6. Reset VLC
Sometimes the VLC media player may not function properly due to changes in the configuration settings. As you might know, VLC provides several features and options to customize your video by selecting various built-in settings. If you have made any incorrect changes to the settings, it may cause problems with sound while playing videos on VLC.
To fix this, you can reset the VLC preferences to default settings. Here’s how to reset VLC:
1. Launch the VLC media player on your Windows computer.
2. Click on Tools from the top menu bar and select the Preferences option. Alternatively, you can press Ctrl + P to open the Preferences window.
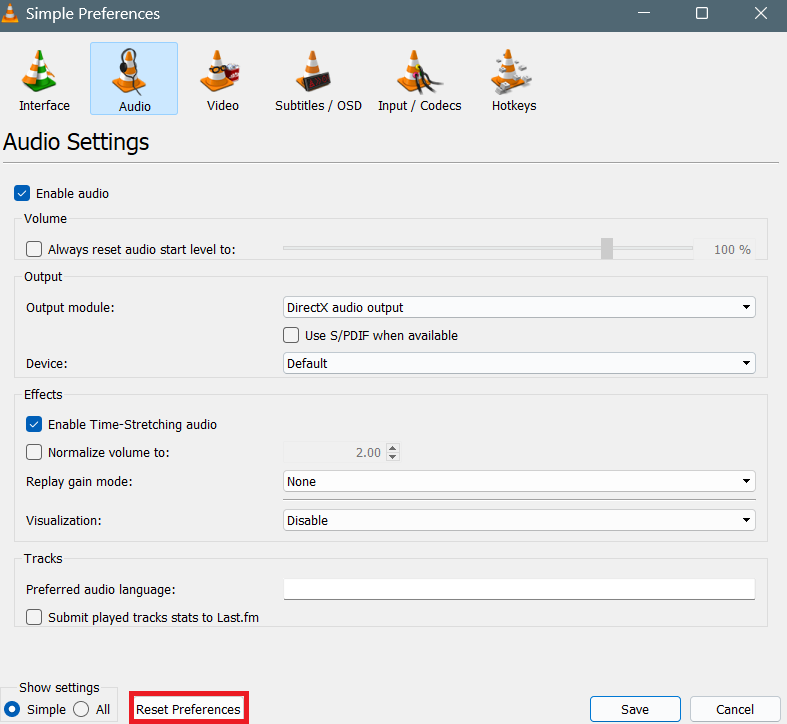
3. Under the Simple Preferences menu, click on the Reset Preferences option located at the bottom of the menu.
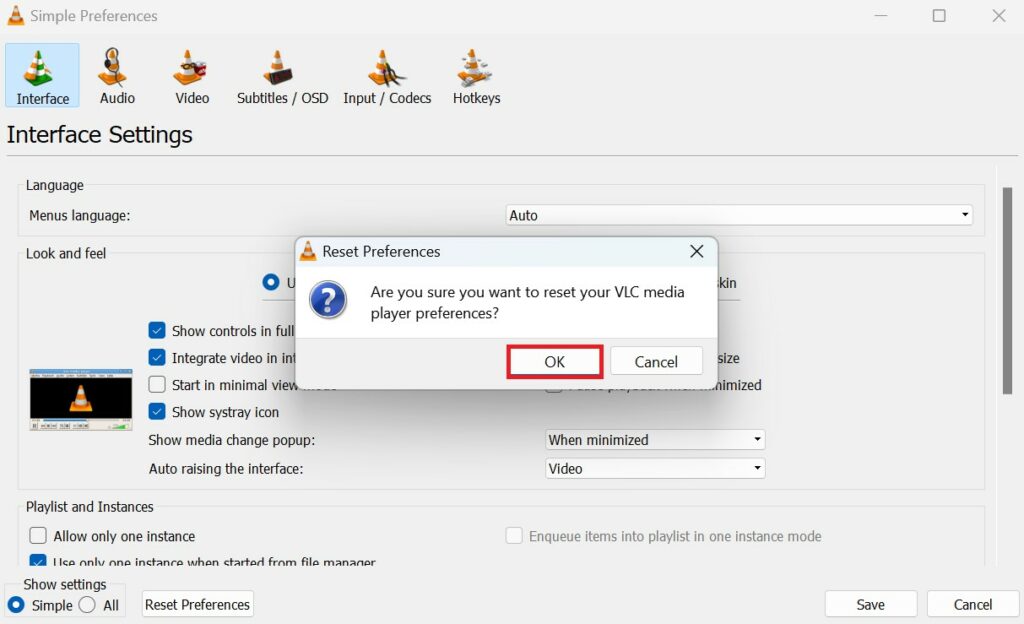
4. A Reset Preferences prompt will appear. Here, click on OK to confirm the action.
5. Once you are done with the reset process, launch VLC and play a video to check if the issue has been resolved.
7. Update VLC to the Latest Version
If you’re still experiencing the ‘VLC no sound on Windows 11’ issue, the solution could be as simple as updating VLC to the latest version. You may be using the VLC older version that prevents you from playing sound in videos. This can be easily fixed by updating VLC to the latest version.
Here’s how to check for VLC media player updates by following the steps below:
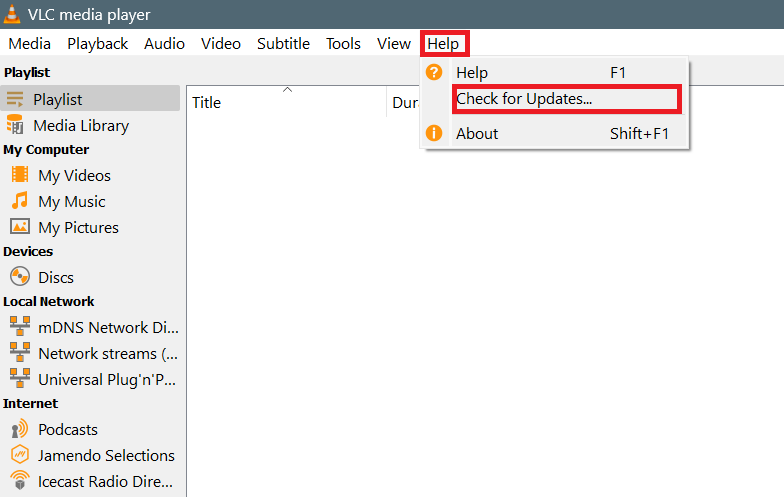
1. Launch the VLC media player on your computer.
2. Click on the Help option from the menu bar at the top and then click Check for Updates.
3. If there are any updates available on the screen, follow the on-screen instructions to download and install it.
4. Once installation is finished, launch it and play the video to check if the issue has been fixed.
Conclusion
That’s it; this is how you can troubleshoot and solve the VLC no sound on Windows 11 issue. By going through all the solutions outlined in this guide, you should be able to identify and fix the issue with sound on the VLC media player.
However, if you are still unable to fix the sound issue on VLC, you can check out our guide on how to fix VLC not working on Windows 11. We hope this will resolve the issue you are facing with VLC Media Player on the Windows operating system.