VLC is undoubtedly one of the most widely used open-source media players among Windows users. It offers a range of features that are not available in other video players, making it stand out from the crowd. However, being an app based on codes and working with different sets of hardware sometimes creates problems in the application’s performance. Users often face random issues, which are nothing but simple bugs or inconsistencies that can be fixed.
The chances of VLC not working on Windows are already very low. However, with new updates or during some changes in the system, the chances of it not working increase considerably. If you are facing the problem of VLC not working on your Windows PC and are unsure of the exact reason behind it, then read on till the end of this article to discover all the possible reasons and fixes.
How to Fix VLC Not Working on Windows 11
VLC is a top-rated open-source media player among Windows users. If you are currently experiencing issues with VLC not working on your Windows 11, here is a list of troubleshooting methods you can use to fix the problem.
1. Reboot Your PC
This is probably the best and simplest way of fixing the issue of VLC not working on your Windows PC. A simple restart will ensure that if there is any minor error in the application or the system, it gets fixed easily.
Rebooting a Windows PC is fairly easy. Here’s how you can do so:
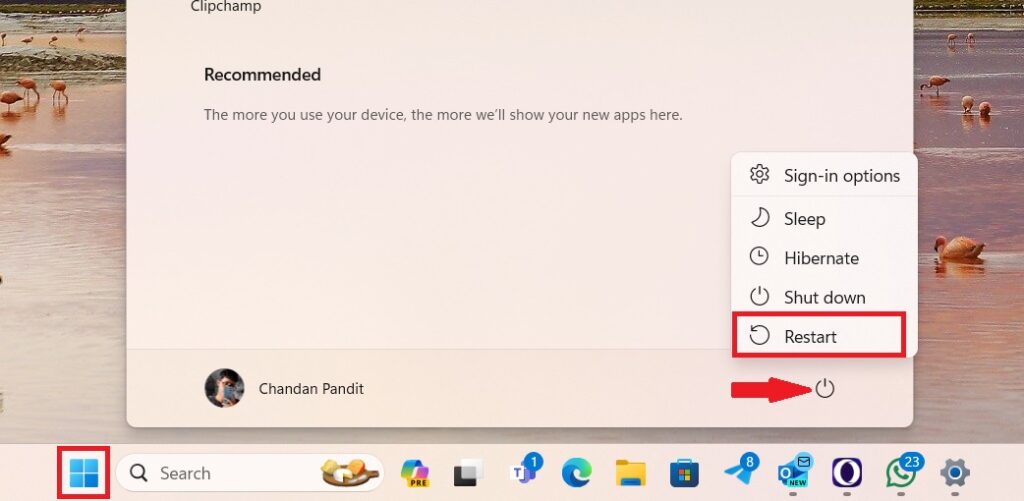
1. Click on the Start icon on the taskbar to open the Start Menu.
2. Click on the Power button present on the bottom right-hand side of the window.
3. Choose the Restart option from the menu that appears.
That’s it. Now, wait for the reboot process to complete. It may take a few seconds or even minutes to reboot your PC. After that, try to use VLC Media Player.
2. Check the File Format
While the VLC media player does support a lot of file formats, there are some format or specific issues with the file itself where the player fails to play the video or ends up showing an error.
In this case, there’s no other way to fix it. You can just try to change the video format and play it again. Here’s the list of file formats VLC can play – MPEG-2, MPEG-4, H.264, MKV, WebM, WMV, and MP3. Further, you can head over to the official website of VLC to learn more about the compatible video formats.
Once you have checked the list and cross-checked it with the file format of your video and found it incompatible, you should try to change the file format.
3. Delete the Corrupted VLC Cache
However, if the issue is not fixed by following the above steps, you can try to delete the VLC Cache files. It’s important to note that as time passes, the VLC media player accumulates cache files on your system.
If the app has stored a considerable number of cache files, there is a possibility that they are causing issues, hindering its proper functioning.
Here are the steps you can follow to delete the VLC cache files.
1. Close VLC Media Player before following the steps.
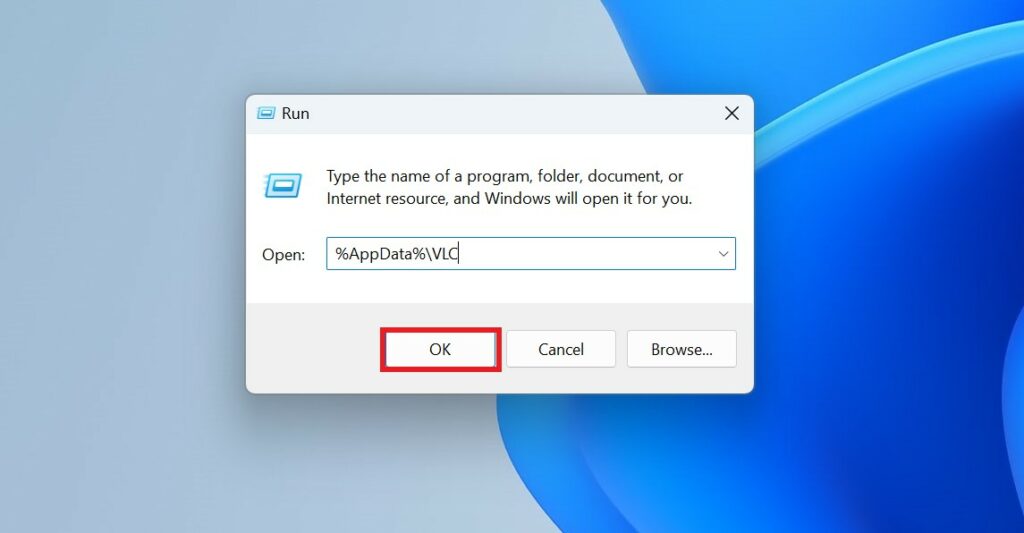
2. After that, press Win + R to open the Run command.
3. In the text field, type the following command and hit the Enter key.
%AppData%\VLC
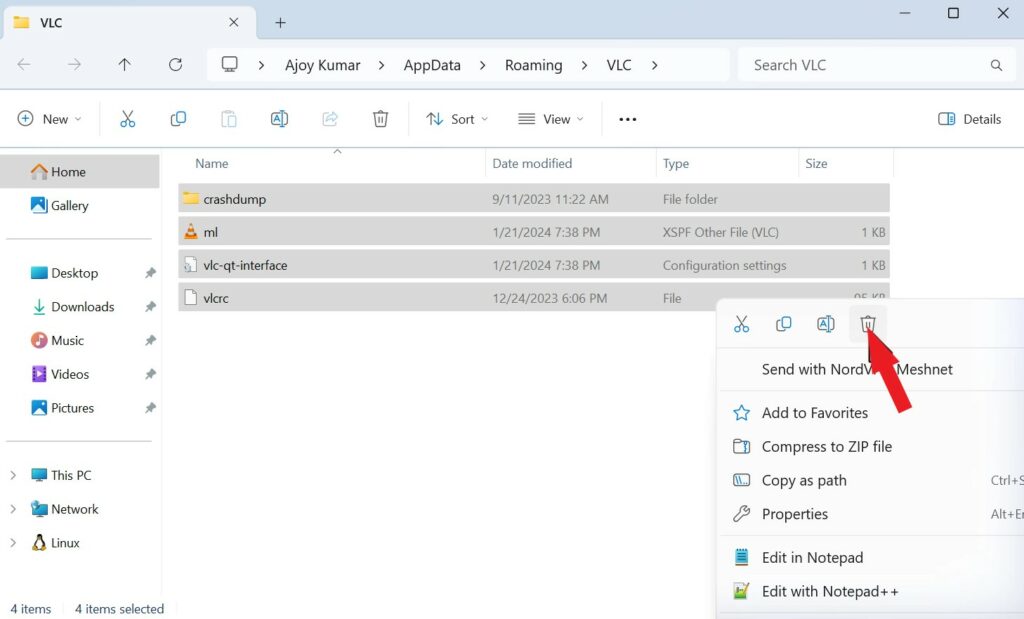
4. It will open the cache folder of VLC; select all folders and files by simultaneously pressing the Ctrl + A keys.
5. After selecting everything, right-click anywhere on the screen and choose the Delete option to remove them.
After deleting all the VLC cache files, restart your system and try to use VLC Media Player. However, if you still face issues, follow along with the guide.
4. Disable Hardware Video Decoding
If you’re encountering playback issues or glitches while using VLC Media Player, disabling hardware video decoding can be a troubleshooting step. Hardware video decoding offloads video processing tasks to your computer’s graphics hardware, but sometimes it may lead to compatibility issues.
Follow the steps below to disable hardware video decoding:
1. Open VLC Media Player.
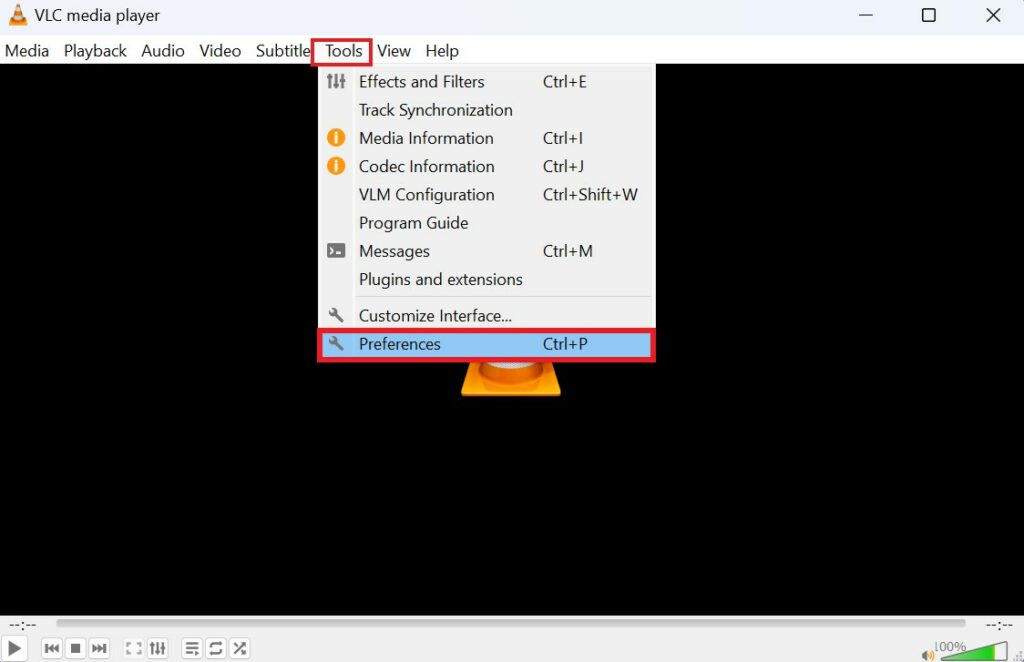
2. Click on the Tools tab and select the Preferences option.
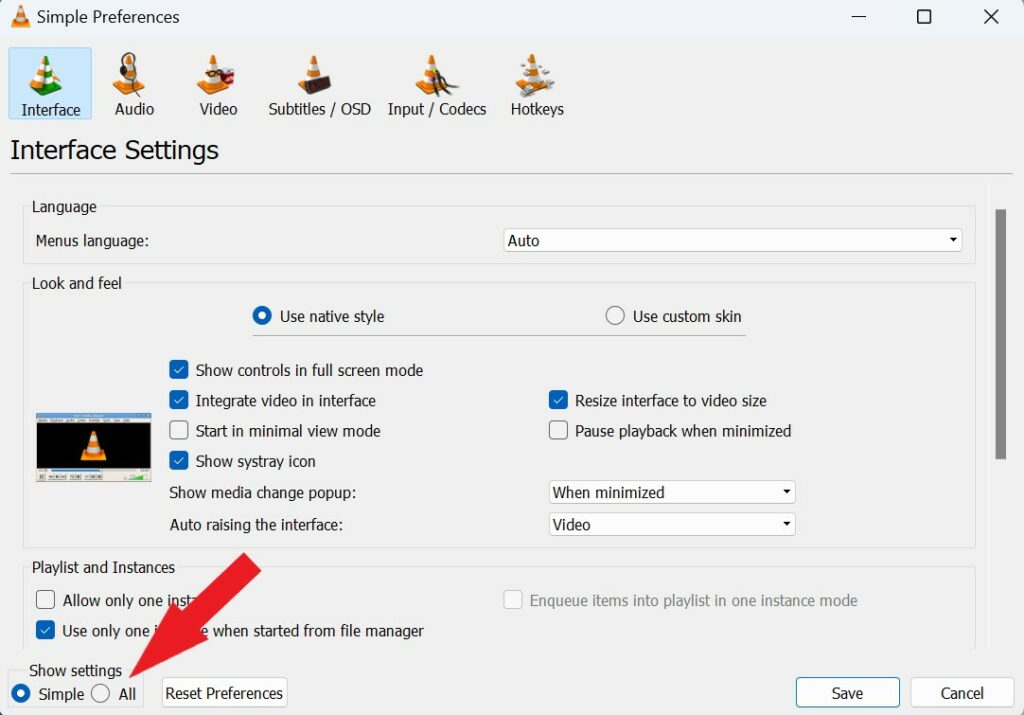
3. In the Preferences window, click on the All radio button.
4. Navigate to the Input/Codecs section in the left menu.
5. Look for the Video Codecs menu and expand it.
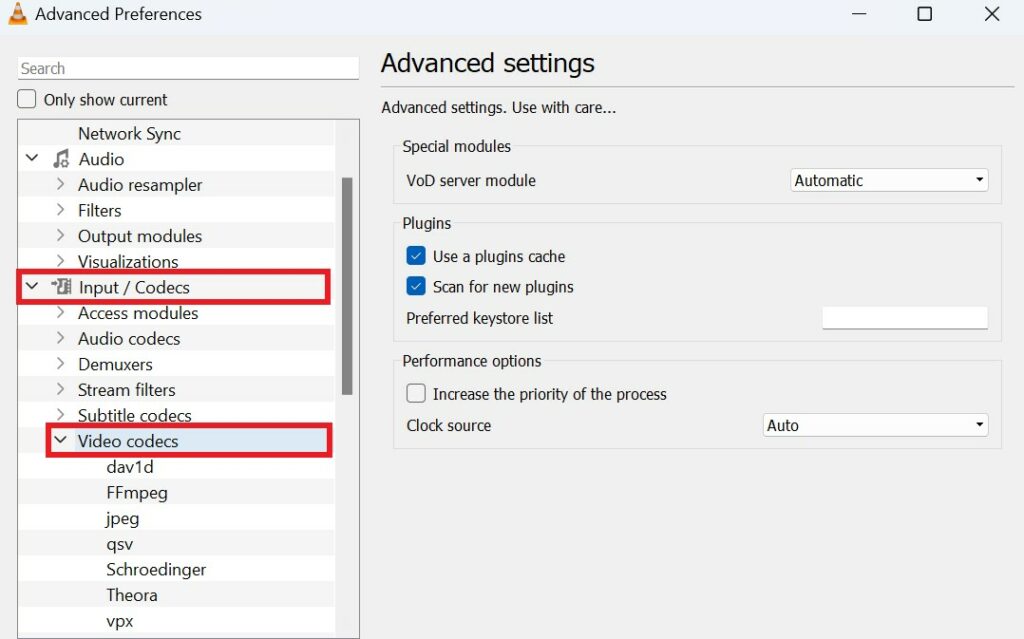
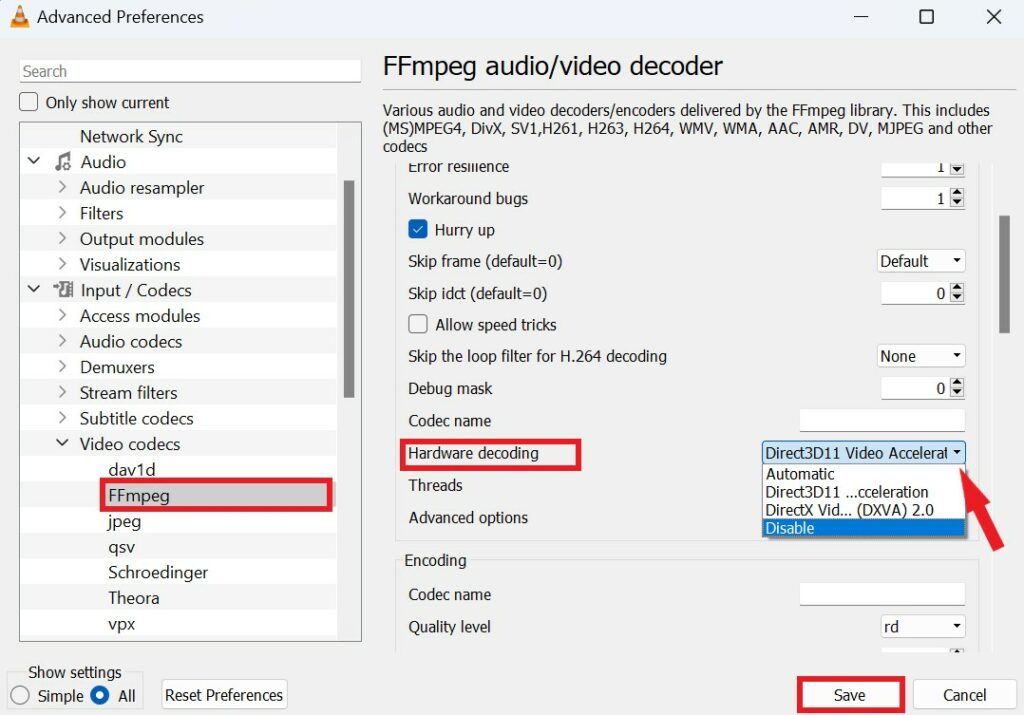
6. From the menu, select FFmpeg and find the Hardware decoding option in the right panel. Here, from the drop-down menu, choose Disable.
7. Finally, click on the Save button and try playing a video to check if the issue is resolved or not.
5. Turn Off Hardware Acceleration
The VLC Media Player comes with a feature called Hardware Acceleration which does some changes in the encoding and decoding process of some selected videos to give you a smoother playback.
Even though this feature is meant for something good, sometimes, it fails to do its task. On the other hand, due to some hardware compatibility issues, the feature doesn’t work well hence creating problems during the video playback. Disabling the Hardware Acceleration may solve the problem of video not playing.
Here’s how you can do so:
1. Open VLC Media Player and press Ctrl + P hotkeys to open the Preferences window in the player.
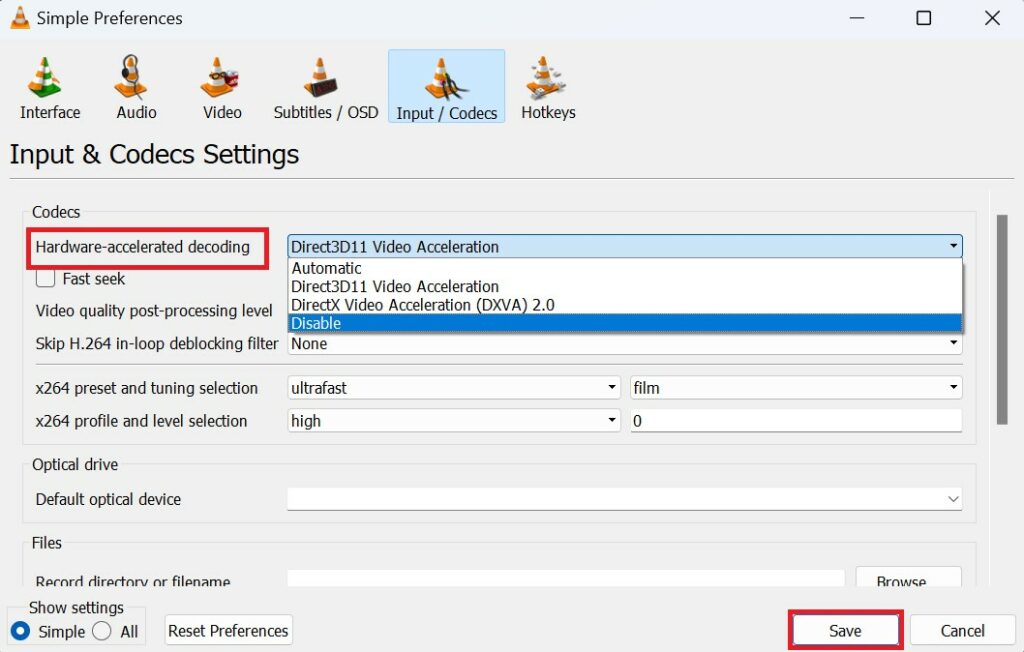
2. Now click on the Input/Codecs section.
3. Here, click on the drop-down menu present next to the hardware-accelerated decoding option and choose Disable.
4. After that, click on the Save button. You are all good to go.
6. Increase Caches Value
The VLC comes with two types of caches; network and file cache. The platform uses these caches to play the video smoothly. It occupies a certain amount of cache on the system to support the playback.
However, the default set limit for both caches can sometimes create problems in the video playback. So, we recommend increasing the cache value so that the issue can be resolved.
Here is step by step method on how you can do so.
1. Open VLC Media Player.
2. Press the Ctrl + P button to open the Preferences window.
3. In the bottom area, find the Show Setting option and click on All.
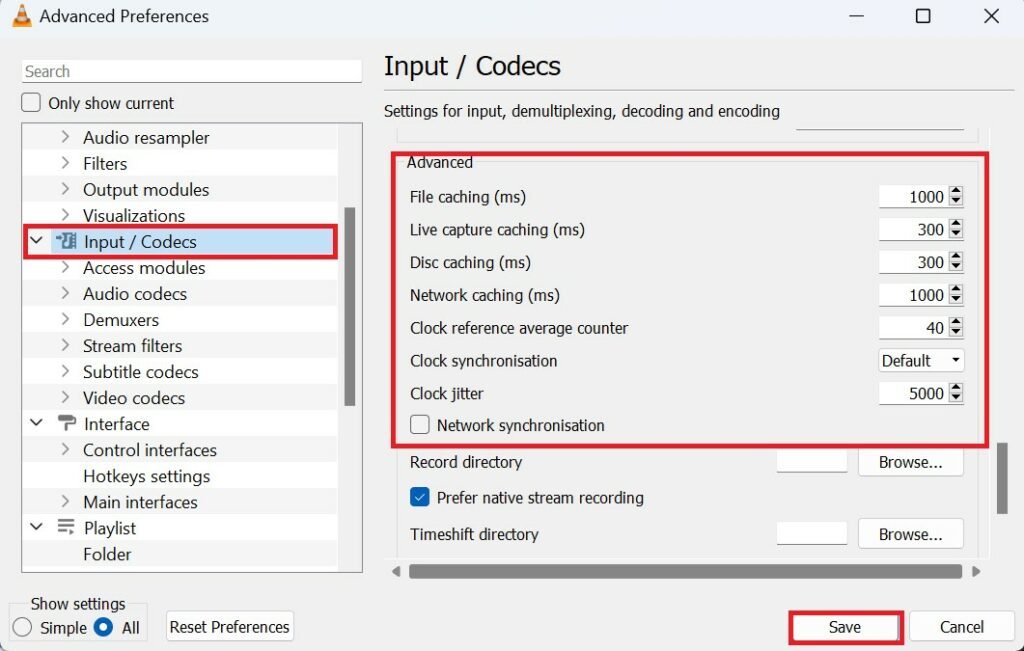
4. On the left panel, click on the Input/Caches section.
5. In your right-side menu, scroll down to go to the Advanced section.
6. Now change the File Caching (ms) to 2000 and Network caching (ms) to 1500.
7. Finally, click on the Save button.
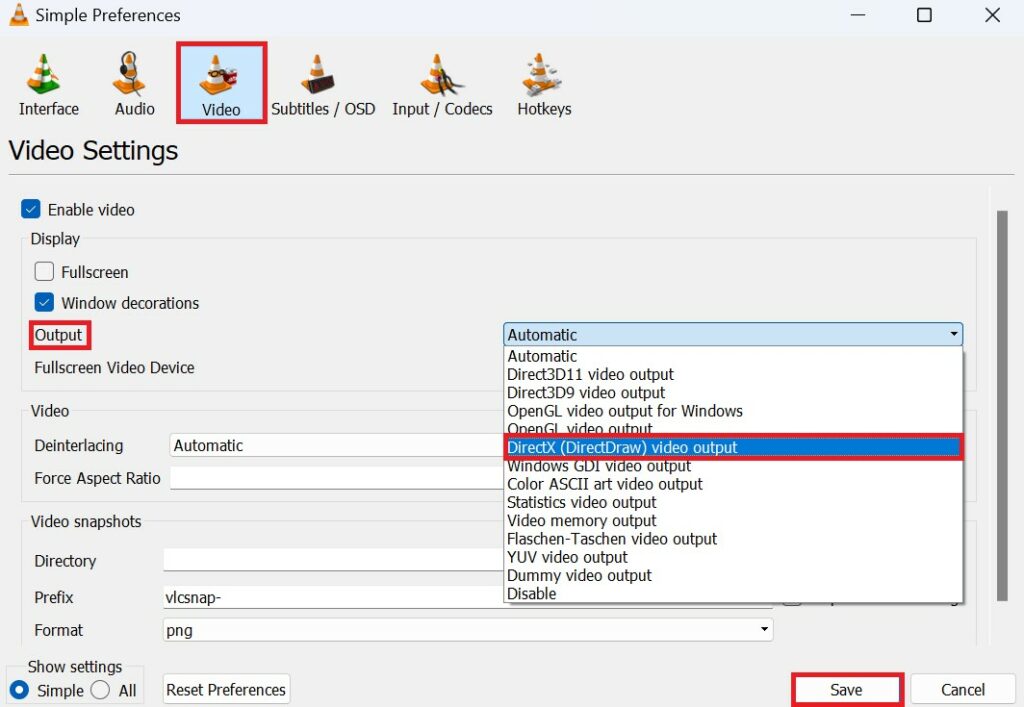
7. Change Video Output Mode
The default video output mode on VLC is set to OpenGL Video Output for Windows. This is the most commonly used video output mode and is compatible with most of the videos. However, in certain cases, the output mode fails to play the video properly. This is the case with certain types of videos and the only solution to this is to change the output mode on VLC.
Let’s see how to change the video output mode:
1. Open VLC and go to the preferences window by pressing the Ctrl + P hotkeys.
2. Here, click on the Videos menu.
3. Click on the dropdown menu present next to the Output section and select DirectX (DirectDraw) video output mode.
4. Finally, click on the Save button at the bottom-right
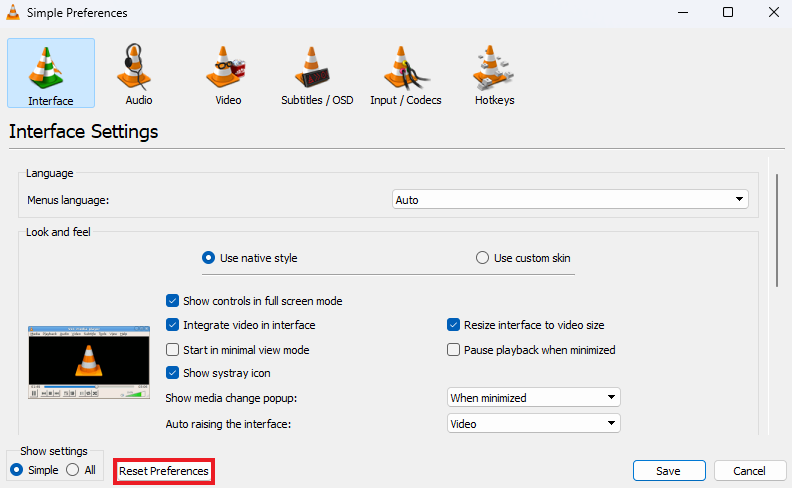
8. Reset VLC Preferences to Default
After following all the troubleshooting methods, if VLC Media Player is still not working properly, there might be some settings that you have changed, causing issues that you are unable to figure out. In such a case, you can reset VLC preferences to the default.
Here’s how you can do it:
1. Open the VLC Media Player.
2. Then, click on the Tools tab and select the Preferences menu.
3. Click on the Reset Preferences option available in the bottom area.
9. Update GPU Drivers
As video playback depends on the GPU, sometimes outdated drivers for your graphics processing unit could cause the VLC media player to not function properly. To fix issues related to the GPU, you can update the graphics driver.
To update graphics drivers and fix VLC media player issues, follow these steps:
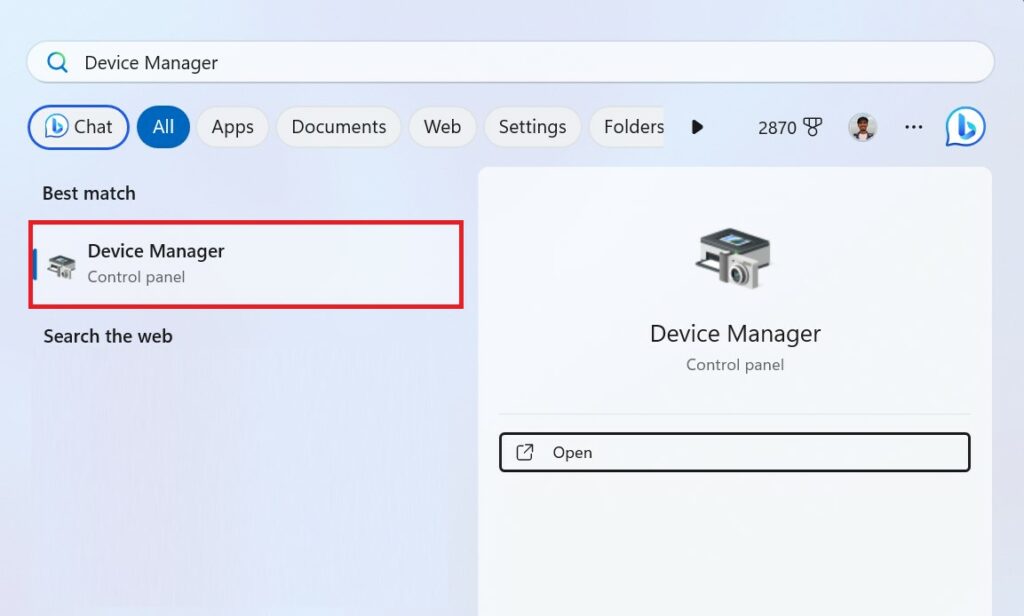
1. Click on the Start button.
2. In the search bar, type Device Manager and open it.
3. Look for the Display adapters option in the list of drivers and click on it to expand.
4. Find your GPU name and right-click on it.
5. Select Update driver from the available items.
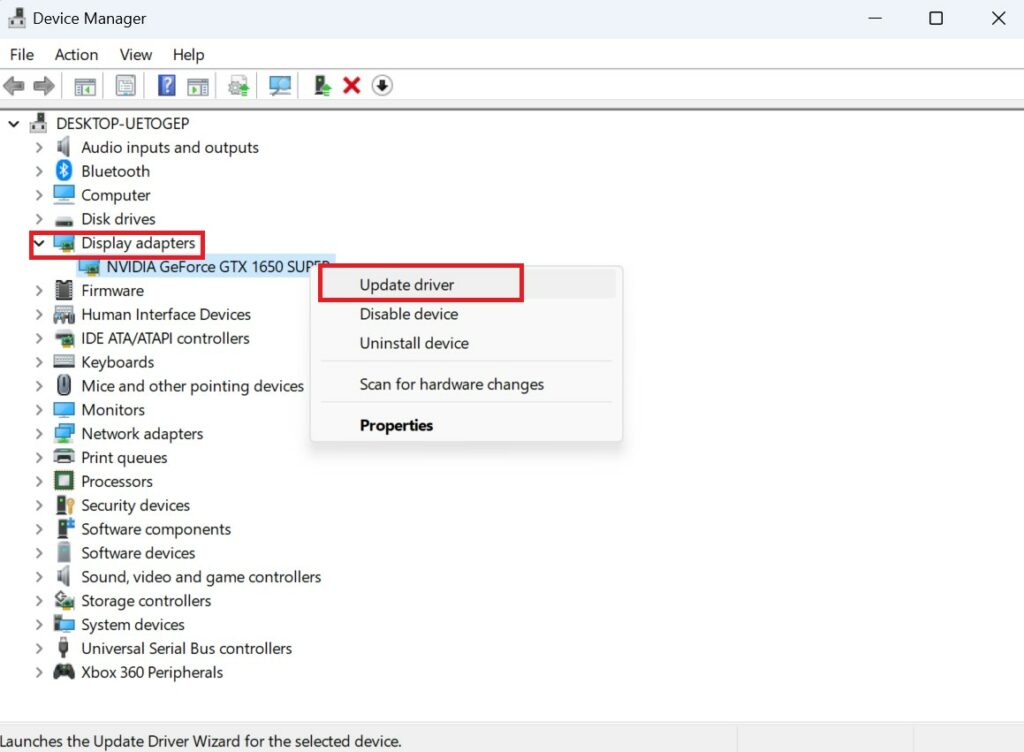
6. Follow the on-screen instructions to install the latest display drivers on your computer.
These steps will help you resolve any issues you may be experiencing with the VLC media player due to GPU.
10. Update Windows
Sometimes, the main reason behind VLC failing to play any kind of video is Windows itself. Yes, in rare cases, some bugs in the Windows operating system create problems for the media player, hence stopping it from working properly.
In this case, you should check if the latest update is available for Windows. If any update is available, you should install it as soon as possible and check whether VLC is working fine or not.
Here’s how you can check for updates and install them if available:
1. Press Win + I to open Settings in Windows.
2. Click on the Windows Update section.
3. After that, click on the Check for Updates button.
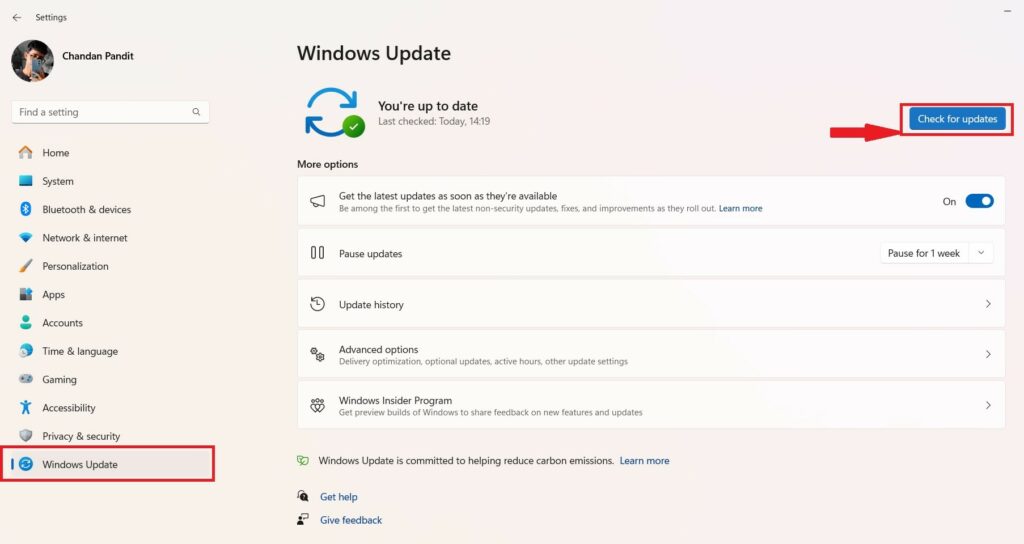
4. If any update is available, click on Download and Install and wait for the update process to complete.
5. After that, restart your device.
11. Update VLC Media Player
After updating the operating system, if you are still facing some issues, then the root cause of the video not playing issue in VLC sometimes comes down to a simple application bug or glitch. VLC keeps updating its application from time to time to fix any known issues. You should try updating the application and then recheck whether the issue is present or not.
Here’s how you can update VLC Media Player:
1. Open the VLC media player.
2. In the context menu, click on Help and then click on Check for updates.
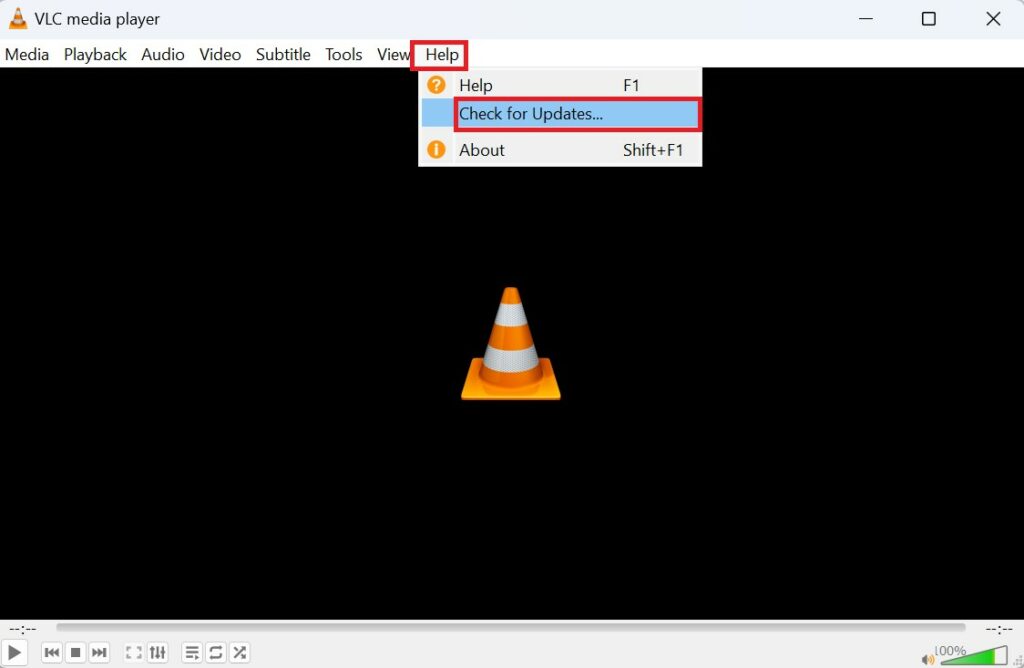
3. This will check whether a new update is available or not. If available, you will get an option to install it from there only. Update to fix the bugs.
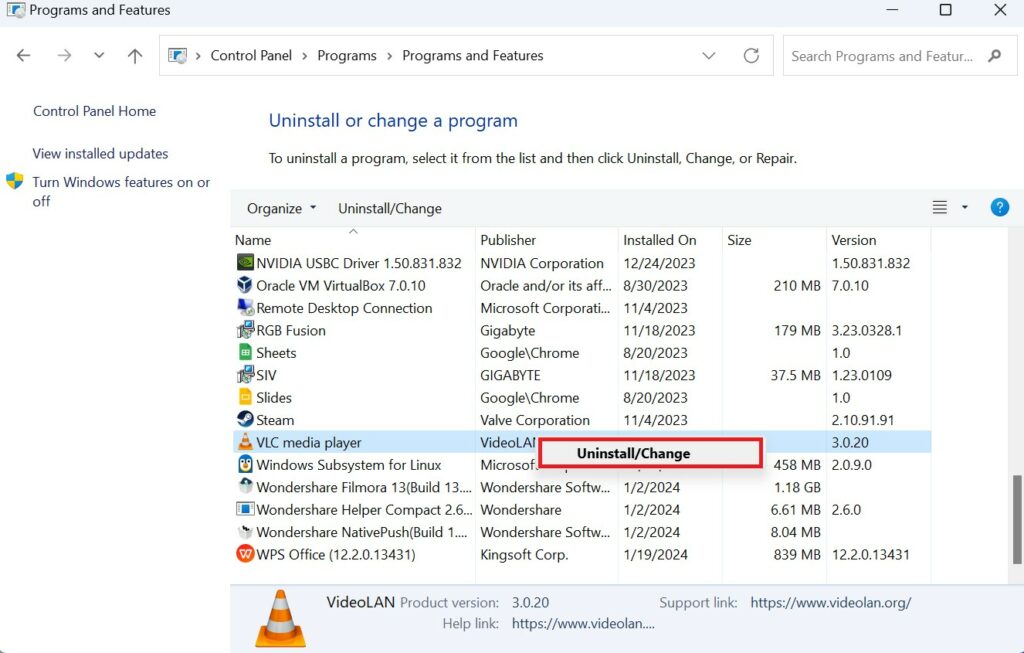
12. Reinstall the VLC Media Player
If none of the solutions mentioned earlier resolved the issue with VLC media player, it is possible that there was an error during the installation process. The best course of action in this scenario is to uninstall VLC and then reinstall the latest version.
Follow these steps to do so:
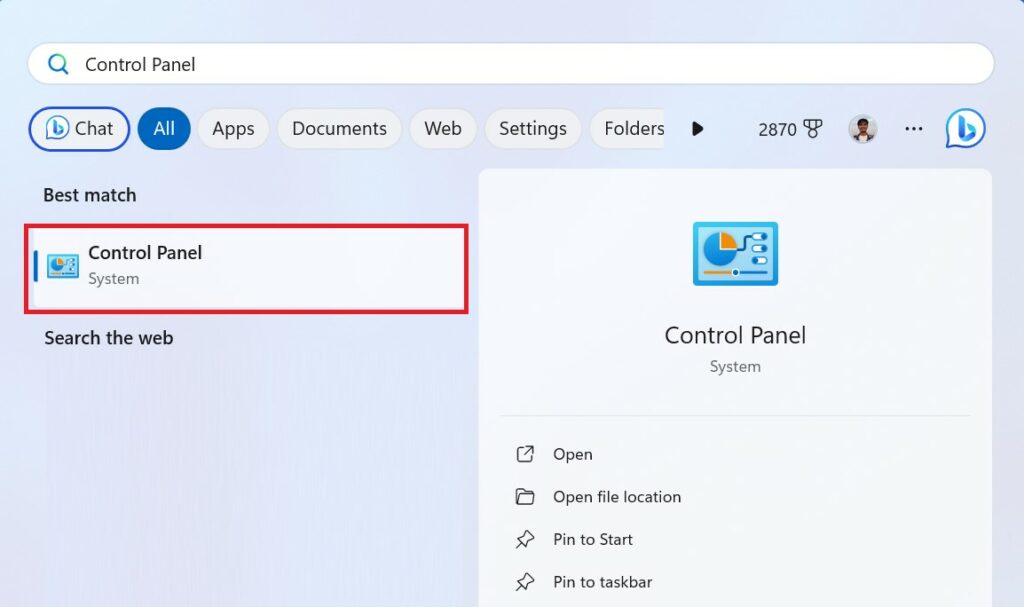
1. Click on the Start button and type Control Panel in the search bar.
2. Then, open the Control Panel.
3. Select the Uninstall a program option.
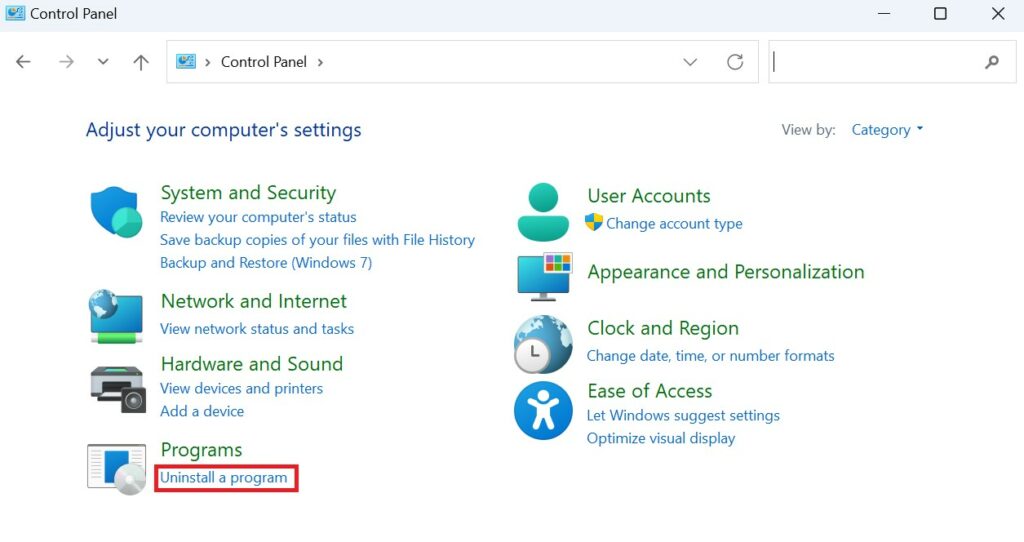
4. From the list of installed programs, locate VLC Media Player, right-click on it, and choose to uninstall.
5. After that, visit the official website of VLC, download the latest version, and install it. Alternatively, you can refer to our guide on how to install VLC on Windows 11.
This should hopefully resolve the problem you were experiencing with VLC not working on Windows 11.
Conclusion
VLC is no doubt one of the most popular and reliable video players in Windows. However, sometimes it does fail to play the video and we have already mentioned all the best possible methods using which you can try to fix the issue.
We are pretty confident that your issue has been resolved by the time you are reading the conclusion. But if you are still facing the problem then we recommend reporting it to the VLC developers. Alternatively, you can leave your comments in the comment section, and we will work on finding a solution for you.