VLC is one of the most popular Media Players loaded with lots of features. One of the features is to take a snapshot of a video. Taking a snapshot of a video using VLC Media Player is a useful feature that can be helpful in many different situations.
Whether you’re trying to capture a specific moment in a movie/video or you need to take a screenshot of a video for a presentation, VLC makes it easy to do so. Here is a detailed guide to taking a picture snapshot of a video using the VLC Media Player.
Take a Picture Snapshot of a Video Using VLC
An easy-to-use feature of VLC Media Player that can be helpful in a variety of situations is the ability to take a screenshot of a video. VLC makes it simple to do so, whether you’re a student who has to take screenshots for a presentation or just a movie enthusiast trying to capture a favorite scene. You can take a high-quality screenshot of any video you’re watching with only a few mouse clicks.
Here are the steps you can follow to do so:
1. Open the VLC Media Player app. Download VLC Media Player if you don’t have VLC installed on your device.
2. To take a screenshot. First, open your video with VLC Media Player.
3. Then, get to the scene that you want to capture. You can use VLC’s frame-by-frame feature to access a specific frame in your video.
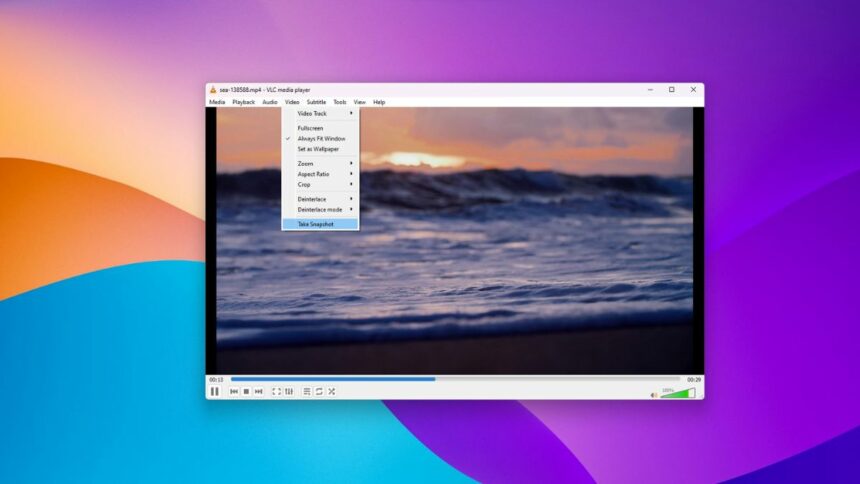
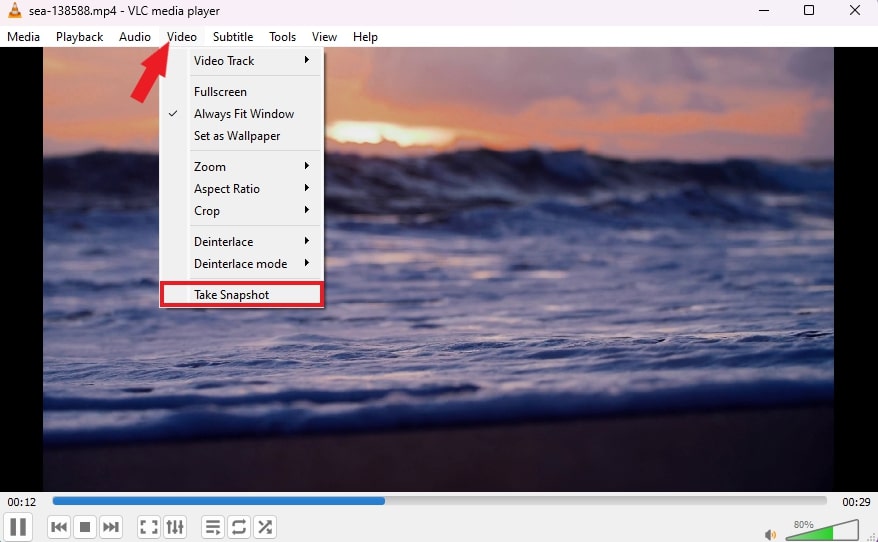
4. Click the Video tab from the top menu. Then click on the Take Snapshot option. Alternatively, you can also use the keyboard shortcut:
- Windows and Linux: Shift + S
- Mac: Command + Alt + S
5. If you’d like to use advanced controls to capture the screenshot and record the video, then from VLC’s menu bar, select View and choose the Advanced Controls option to enable those controls.
6. Then, in VLC’s bottom-left corner, click the camera icon to take a snapshot.

Configuring Snapshot Directory and Formats
If you have a question about where to find the captured screenshot; head to the following folder on your Windows, Mac, or Linux computer:
- Windows: C:\Users\username\Pictures
- Mac: Desktop/
- Linux: ~/Pictures
Now, if you want to change the default location where VLC Media Player stores your snapshot, or you’d like to change the file format, then follow the following steps:
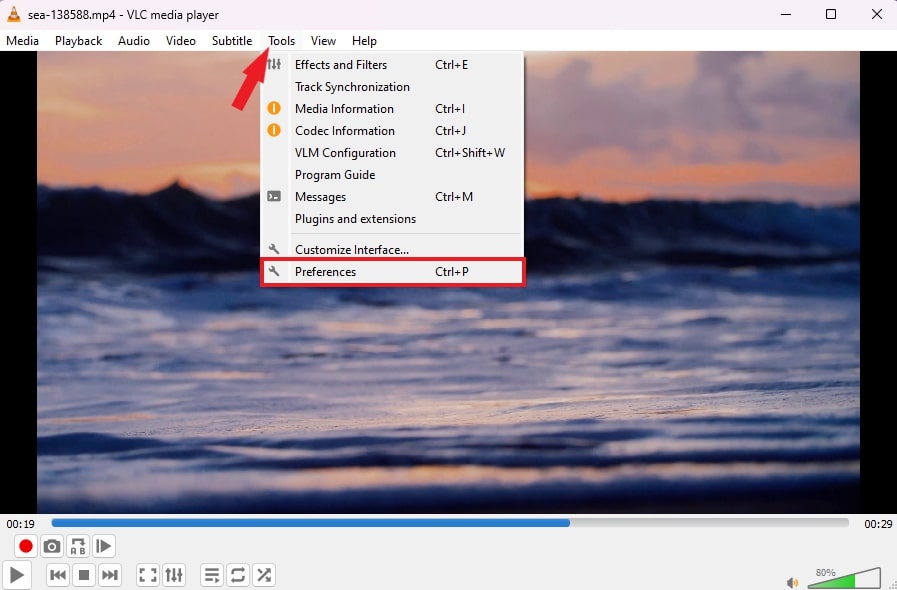
1. Click on the Tools tab and select the Preference option. Or you can use the shortcut key Ctrl + P to open the setting panel. For macOS, you can press Command (⌘) + , shortcut keys.
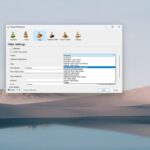
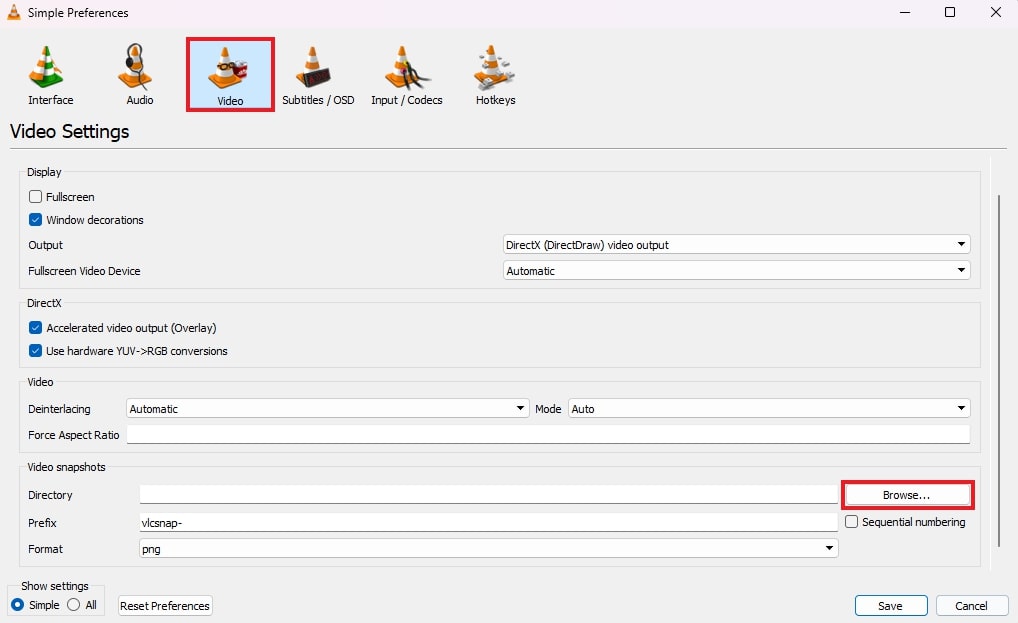
2. It will open the Simple Preferences setting panel. Here, choose the Video option. To change the default screenshot directory, click on the Browse options under the Video Snapshots section.
Note
The filename prefix, which is automatically appended at the start of the file name with the date and time of creation, can also be changed.
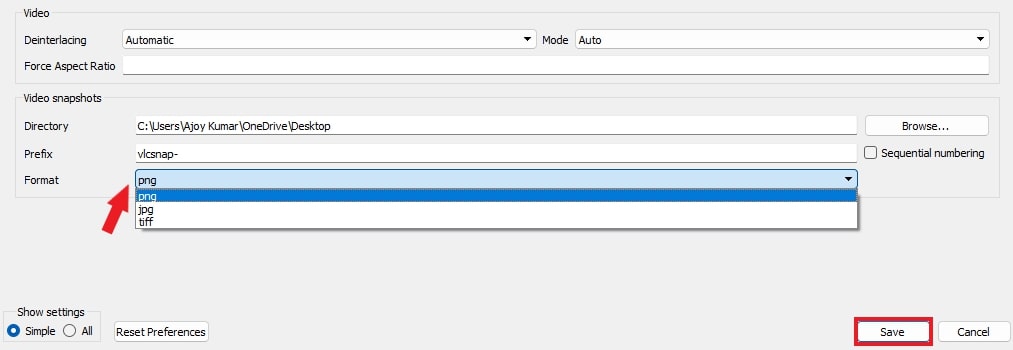
3. To change the format of the snapshots, select the file format from the drop-down menu.
4. Now, to save your settings after configuring the snapshot directory and format, click the Save button.
Conclusion
That’s it; this is how you can take a picture snapshot of a video using VLC Media Player. However, if you are looking to enable PiP in VLC, you can check out our guide on how to enable picture-in-picture mode in VLC.
I hope you find this guide helpful. If you liked the article, share it with your friends. However, if you have any queries, please do not hesitate to write them in the comment section below. I will surely reply to you.